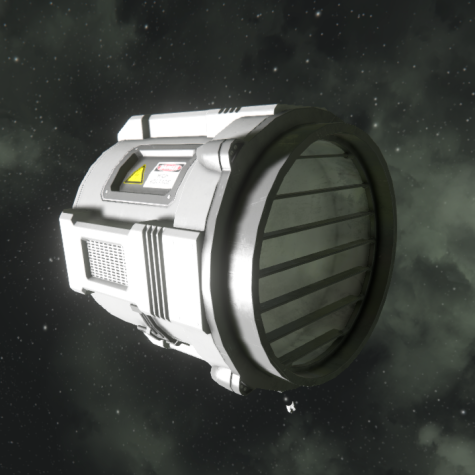
Spotlight


Light block information is listed in the table down below.
| Components | Required |
| Bulletproof Glass | 4 |
| Functional | |
| Construction Component | 15 |
| Interior Plate | 20 |
| Large Steel Tube | 2 |
| Steel Plate | 8 |
| Info | |
| Dimensions (W,H,L) | 1,1,1 |
| Mass | 450 kg |
| Integrity | 1,910 |
| Build Time | 20 s |
| Max Reflector Light Radius | 160 m |
| Reflector Cone | 52 ° |
| Max Light Radius | 10 m |
| Max Light Intensity | 5 |
| Max Required Input | 1000 W |
| Power Consumer Group | Utility |
| Is Airtight | No |
| PCU Cost | 25 |
| Components | Required |
| Bulletproof Glass | 2 |
| Functional | |
| Construction Component | 1 |
| Interior Plate | 1 |
| Large Steel Tube | 1 |
| Steel Plate | 1 |
| Info | |
| Dimensions (W,H,L) | 1,1,1 |
| Mass | 86 kg |
| Integrity | 325 |
| Build Time | 7 s |
| Max Reflector Light Radius | 120 m |
| Reflector Cone | 52 ° |
| Max Light Radius | 5 m |
| Max Light Intensity | 5 |
| Max Required Input | 200 W |
| Power Consumer Group | Utility |
| Is Airtight | No |
| PCU Cost | 25 |
Overview
The Spotlight illuminates objects in front of it when turned on. Unlike the Interior Light, it has a much larger range, but drains more power. Can be turned on or off either via the Terminal or by hitting L (default) when piloting/controlling a ship/station. The color, range, falloff and intensity of the light can be customized via the Terminal.
Usage
The Spotlight differs from the Interior Light in that it can be controlled directly from Hotkeys. However it functions the same way, but on a much larger scale.
Colour
The colour of the illumination can be changed by adjusting the sliders for Red, Green, and Blue in the RGB colourspace. This will change the colour of the emitted light as well as the colour of the light fixture itself.
Settings
- Radius – Adjusts the size of the light source around the block
- Falloff – How quickly the light dims as distance from the lens increases
- Intensity – Adjusts the brightness of the light
- Blink Interval – The amount of time between flashs
- Blink Length – Adjusts in percentage (taken from interval) how long the flash lasts for
- Blink Offset – Offsets in percentage (taken from interval) how long before the light begins to flash
Media
Tips
- The Spotlight was previously named “Reflector light”.
- It may be useful to assign sensible labels to your Interior Lights as soon as they are installed using the same method, so that any new Interior Lights you install will be easily distinguishable as having a numeric code name, and can then be labelled and coloured more easily.
- If you’re new to flashing lights, and want them to blink in order. Here’s a quick tip. If you have 3 lights, set the first one normally, then the next one with an offset of 20%. The last one you set at 40% offset. You can increase the length/etc as you desire.
Known Issues
- Currently still as of Update 01.094, light sources tend to bleed through blocks. Meaning, if their radius is large enough, you can see them from the other side of a block.
Programming
Spotlight
Interface name: IMyReflectorLight
Parent: IMyLightingBlock
Parent: IMyFunctionalBlock
Fields:
float Radius
float Intensity
float BlinkIntervalSeconds
float BlinkLenght
float BlinkOffset
Actions:
OnOff -> Toggle block On/Off
OnOff_On -> Toggle block On
OnOff_Off -> Toggle block Off
IncreaseRadius -> Increase Radius
DecreaseRadius -> Decrease Radius
IncreaseBlink Interval -> Increase Blink Interval
DecreaseBlink Interval -> Decrease Blink Interval
IncreaseBlink Lenght -> Increase Blink Length
DecreaseBlink Lenght -> Decrease Blink Length
IncreaseBlink Offset -> Increase Blink Offset
DecreaseBlink Offset -> Decrease Blink Offset
